Load and Explore a Mission from Database
Load a Mission
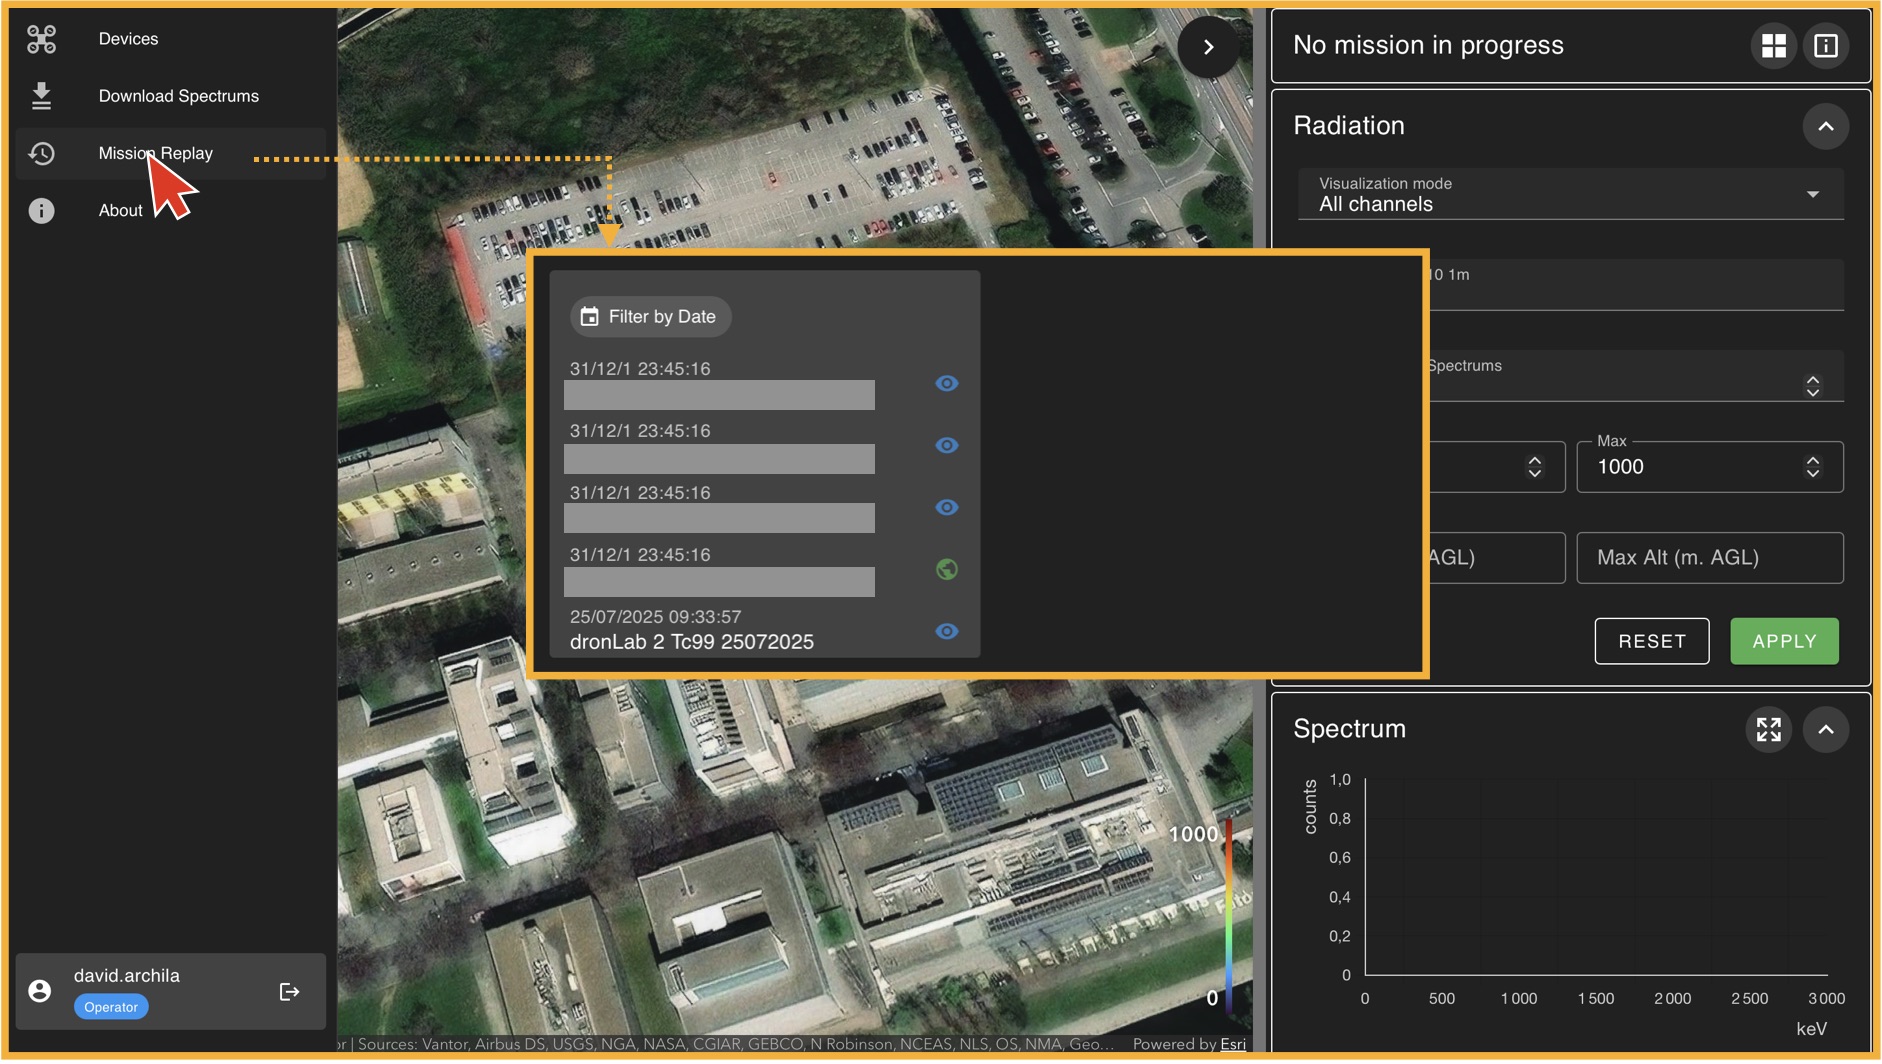
To load a mission, go to the left panel (Panel A) and click on "Mission Replay". This will take you to the "Mission Player" environment, where the first thing you must do is select a mission from the available database. In general, there will always be one mission available for training purposes. If no mission is available, please contact your administrator. Once you select a mission from the list, click on "Load Mission".
The Mission Replay Environment
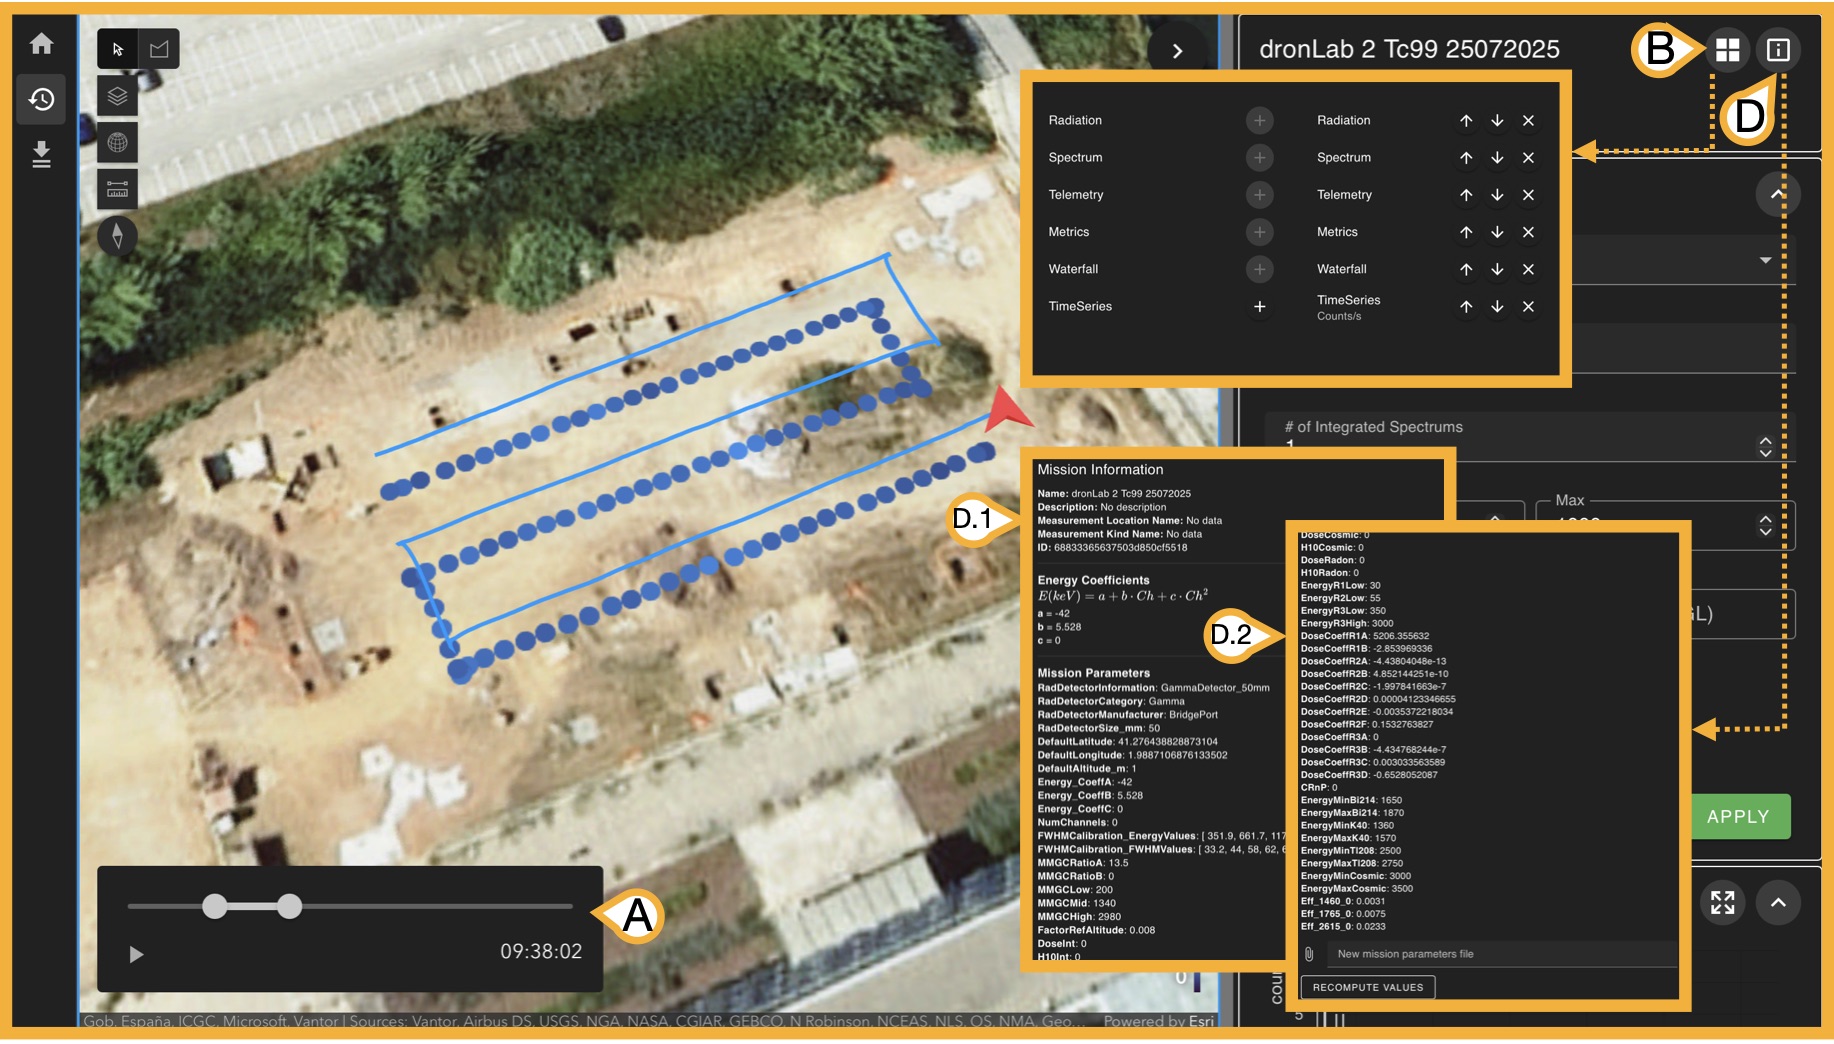
Once a mission is loaded, the right panel (Panel C) now displays all information available from the measurement done, there are 3 key bottons before exploring this informaton.
- (A) Time selector: Given mission measurements have time-stamps, this slider allows you to select a start time and an end time of the measurments you want to analyse from the original measurment
-
(B) Sub-panel Organizer: Panel C has 6 types of subpanels:
- Radiation
- Spectrum
- Telemetry
- Metrics
- Waterfal
- Time Series
- (D) Mission Information: This botton opens a (D.1) scrollable window with the mission parameters that are used to perform internal calculations, these paremeteres are uploaded when creating the mission but can be also (D.2) updated in case its needed if you scroll to the end. We will disscuss this paramerest when we talk about creating yout own mission.
Now we will explore the use of each subpanel.